I will assume you mean FDM 3D printing. FDM printing works by the machine extruding a line a filament (essentially a wire of plastic) through a hot nozzle of a small diameter (typically 0.1mm to 0.8mm).
It will build up the object layer by layer. If the nozzle is 0.4mm, each layer will be about 0.2 to 0.3mm thick.
I guess to answer your question, the knowledge you need to run the machine is how to load the filament, how to calibrate the machine and how to set up the part.
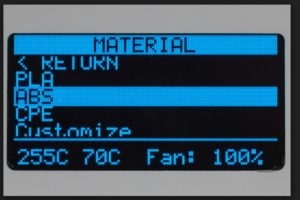
Loading the filament is easy. Most machines have a script (macro) to do this. On my Ultimaker 2, you just pick the material on the screen as shown here.
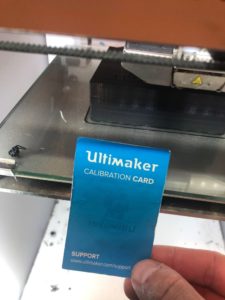
Calibrating the machine is one of the most important things you must get right. First, the bed needs to be level relative to the nozzle. I use this thin card stock and place it under the nozzle in 3 different locations when I run calibration. There are screws under the bed to allow fine adjustment of the level (see arrows)
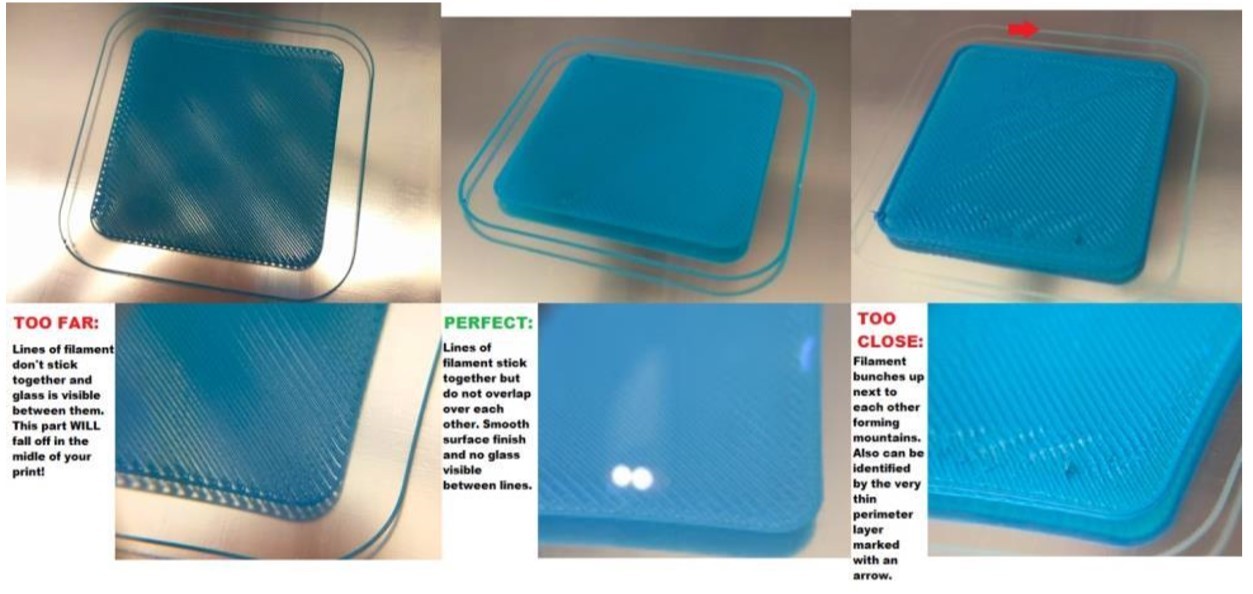
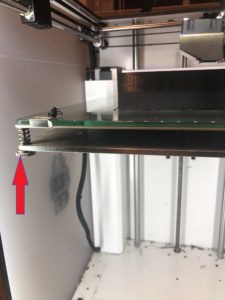 The other part of calibration that is critical is the distance between nozzle and bed. You will know if you have it right when you see the first layer laid down.
If the nozzle gap is too much, the plastic wont stick to the bed and you will have major issues later on. Possibly a total loss to the hot end if it gets wrapped in plastic.
If the gap is too small, you may have a jam before the first layer completes. Sometimes you can get away with it being too small, because once the first layer completes the bed will drop by whatever Z settings you picked and the next gap will be fine. It is better to err on the side of the gap being too small.
But if the gap is just right, the layers will be “smashed down” enough that there will be no space between layers (in x and y) but also no bunching up.
The 3rd thing you need to know to run a 3D printer successfully is how to set up your part. This is the biggest learning curve. Ill assume for the moment that you have a CAD file (in STL format). If you cannot design, you can download STL files but of course, you will be limited by what someone else has made and posted online. You can also hire someone to make the CAD file (like me, my business is CADdesignhelp.com). The cost varies but is typically around $60-100/hour.
Anyways, back to setting up the part. The part is setup in a program called a slicer. There are various brands out there, but I use one called Simplify3D. In this program, you choose the material and other settings. Some printers will come with all these settings figured out for the material you are using. This is true of 2 of my printers: the Ultimaker 2 (UM2) and Fusion F400. The UM2 came with settings for PLA, ABS, Nylon and Flexible materials. The F400 came with those materials, plus many more like PC, PCTPE, other nylons and so on. My 3rd FDM style printer, the Creality CR-10S, did not come with any presets in Simplify 3D, so I had to create it myself. I mostly copied the settings from the F400 but did make some changes for that machine. Most of this knowledge has come from trial and error experience, along with some internet research.
Learning how to tweak these settings is a good idea, as it will save you time and material on parts. All the ways to do that will take too long for a Quora post. But it would make for a good book!
Contact me directly if you need any help with 3D printing or design.
Scott Tarcy
President of CADdesignhelp.com


