3D Printed Parts and Projects (FDM Printing)
3D Printed Parts and Projects (FDM Printing)
I have designed parts for manufacturing and prototyping by using 3D printing. Below are a few case studies of 3D printed parts:
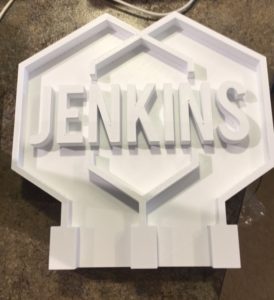
3D Printed Company Logo
Jenkins Electric (in Charlotte, NC), wanted a 3D printed logo block. Since they are in the business of making sand-casted molds, they used this part to create a sand mold. This sand mold was used to create a metal version of this logo block. I used a 1 degree draft angle on this print to make it easier to remove the part from the mold.
3D Printed Pool Connections
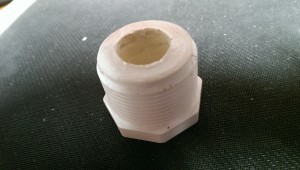
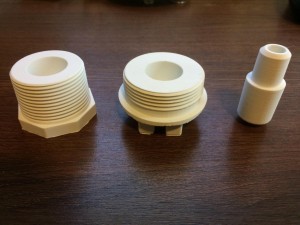
One of my clients owns a pool installation company in Florida. He was constantly in need of special connections for hooking up the plumbing of the pool. There was a certain thread and hex bolt size that did not exist in the market, so he was hand making these parts each time he needed to do an install (see picture “handmade prototype fitting”). He was cutting apart PVC connections and gluing 2 pieces together to make these.
We took his prototypes and created 3D models of each one. Then we 3D printed these in ABS with functional threads so he could test the fit. 3D printed parts do not possess the strength to be used as a part for installation, so my client is looking at getting molds made to make these parts from injection molding. Injection molded parts will also be a lot less expensive per part when compared to 3D printed parts.
Ultimate Pickle Jar (www.ultimatepicklejar.com)

This client has a passion for creating his own pickled vegetables. But he found out that the current ways of doing this have the problem of the vegetables floating above the brine in the jar. He thought up a system using a silicone “apron” that holds the vegetables in the jar.
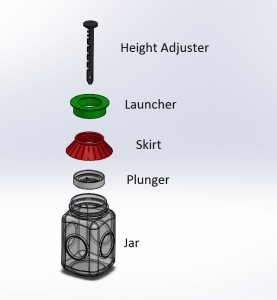
He came to me with hand sketches and from this we created the 3D models of each part. The assembly picture shows each part. Here is an explanation of the function of each part:
The Plunger holds the vegetables under the brine. As you can see, it has a holes for the brine to flow through it.
The Skirt goes around the Plunger and “hugs” the side of the Jar as the system is lowered. This part prevents any vegetables from sneaking around the sides of the Plunger.
The Launcher is only used when the Plunger and Skirt are first lowered into the Jar. It is used to push both the Plunger and Skirt down into the Jar. It is not needed after that.
Finally, the Height Adjuster is used to control the position of the Plunger and Skirt once they are installed into the Jar. As vegetables are removed, the Height Adjuster is moved down to force the Plunger and Skirt lower into the Jar.
The Height Adjuster, Launcher, Skirt and Plunger were 3D printed to prove the concept and for showing the product in the Kickstarter campaign. The Height Adjuster, Launcher, and Plunger were made from PLA plastic. The Skirt was made from NinjaFlex plastic (a flexible plastic that simulates flexible silicone).


